Transform your space into a magical winter wonderland with this themed backdrop decorating idea! Whether you’re a teacher looking to brighten up your classroom, planning a cozy winter party, or love creative seasonal decor, this DIY project will bring joy to kids and adults alike.
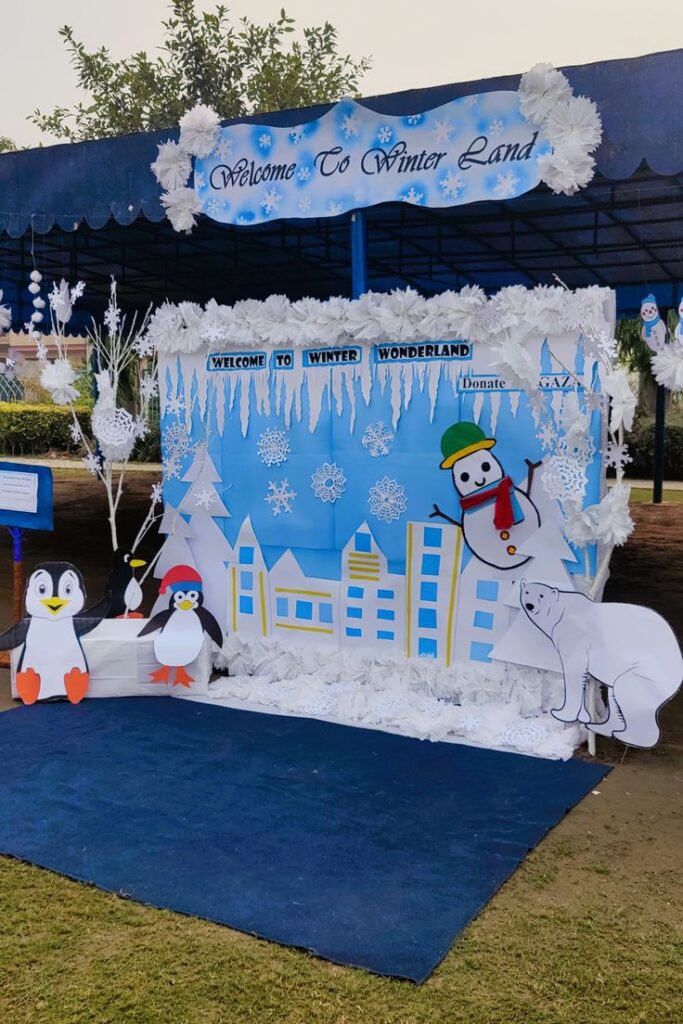
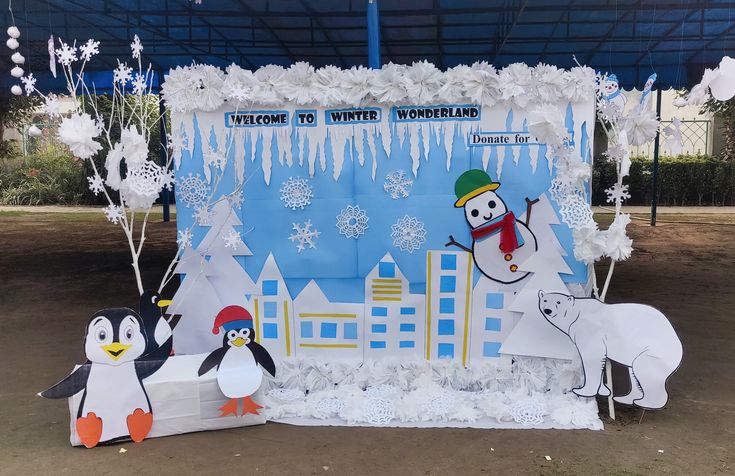
This craft board features whimsical snowflakes, a cheerful snowman with a real scarf, adorable penguins, a polar bear, snow-covered trees, and 3D snow effects — all made with simple, budget-friendly materials. And to make it even easier, we’ve included a step-by-step guide and a video tutorial so you can watch the entire project come together!
Why Create a Winter Wonderland Backdrop?
Decorating for the winter season is more than just putting up a board- it’s about creating a warm, inviting, and imaginative environment that welcomes students, parents, and guests. A Winter Wonderland board not only enhances the aesthetic appeal of your room but also sparks creativity, encourages student engagement, and sets a magical tone for learning.
Educational & Emotional Benefits:
- Encourages fine motor skills through cutting and pasting.
- Promotes teamwork when made with a class or group.
- Sparks’ discussion about seasons, animals, weather, and Arctic life.
- Adds visual warmth during the colder months.
Materials You’ll Need:
- Printed snowman template (provided in images)
- Coloring materials (crayons, markers, or paint)
- Crepe paper (white for snowflakes and fluffy snow effects)
- Scissors & glue
- Large chart paper or board for backdrop
- Cotton or artificial snow
- Decorative elements like silver glitter, icicles, and paper-cut trees
- Crafted penguin and polar bear cutouts
- White-painted branches for a frosty effect
- Hanging snowflakes and 3D snow puffs
- Red cloth for the snowman’s scarf
Step-by-Step Instructions
Step 1: Build the Winter Sky Backdrop
Start with your blue chart paper or sturdy board on the wall. This acts as your sky.
Now, attach the bottom of the background by cutting out white mountain peaks or city buildings from white paper. Use soft curves for snowy hills or sharp peaks for mountains.
Step 2: Create the Snowman Centerpiece
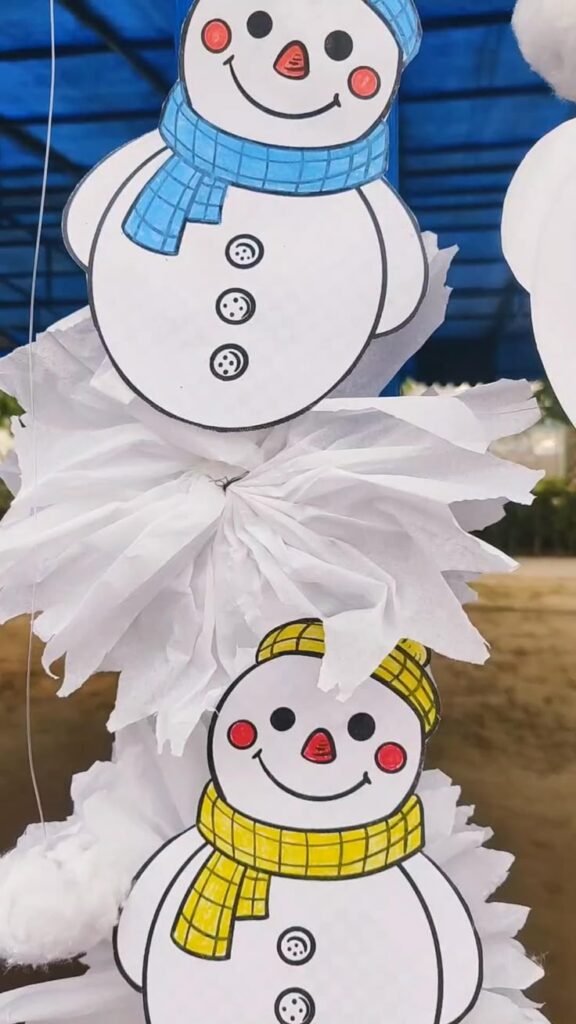
Use the provided printable snowman template, color it, and cut out all the pieces. Assemble it using glue or tape. Accessorize your snowman with:
- A real red cloth scarf for a 3D touch
- Black buttons cut from paper
- Stick arms (drawn or made from brown paper)
- A green hat or beanie for the character.
Place the snowman in the center or on the edge of the board, depending on your layout.
Free Printable Snowman Template PDF
Using the printed snowman template (shown in the pictures), color and cut it out. Assemble the snowman and hold it at an angle for a lively effect. Add details like a green hat, stick arms, and a real red cloth scarf to bring it to life!

Step 3: Craft Your Snowflakes and Winter Effects
Twist white crepe paper to create soft, icy stripes. Use 3D snowflake templates to cut intricate snowflakes from white paper.
Hang them from the top of the board using thread for a floating effect. Add cotton balls underneath for a snowy ground.
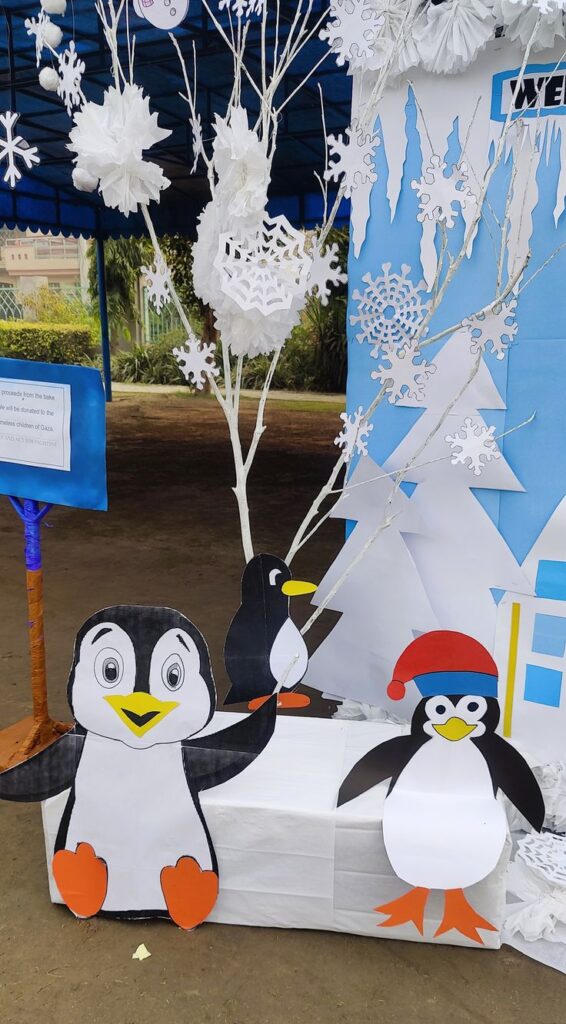
Step 4: Add Winter Animals & Trees
Bring your winter scene to life with friendly faces! Either draw or print penguins and polar bears, color them, and cut them out.
You can even personalize them with
- Small scarves or hats made of felt.
- Googly eyes or sticker eyes
- Puffballs for noses
Place them all over the board — near trees, snowbanks, or standing next to snowmen.
Add white-painted branches or use real twigs for a natural touch. Paste silver foil stars or shiny paper icicles around the edges of the board to enhance the winter feel.
Step 5: Arrange and Paste Everything Together
Once you have all your elements ready, start assembling! Place the big snowman with the red cloth scarf, buildings, trees, and animals strategically on the board. Use cotton or crepe paper fluff underneath to create a fresh snow look.
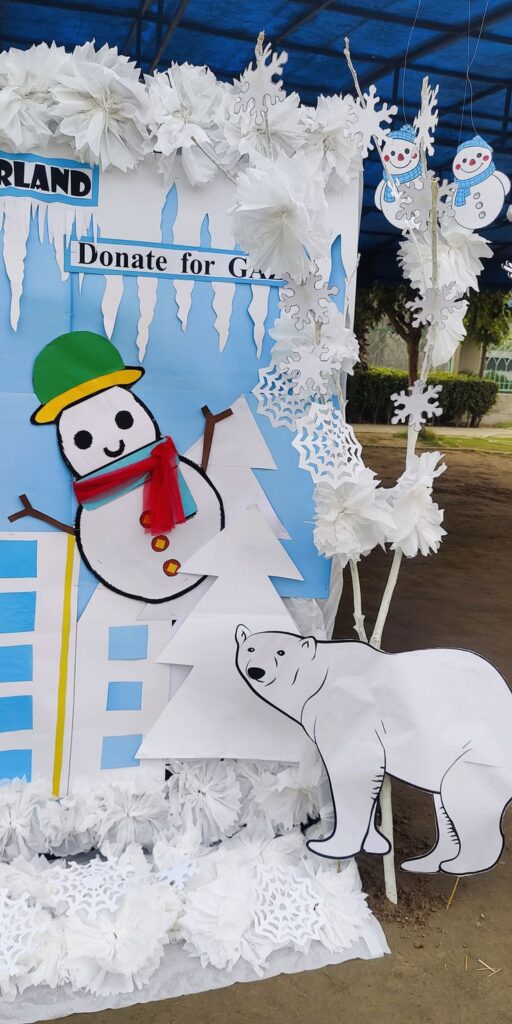
Step 6: Final Touches
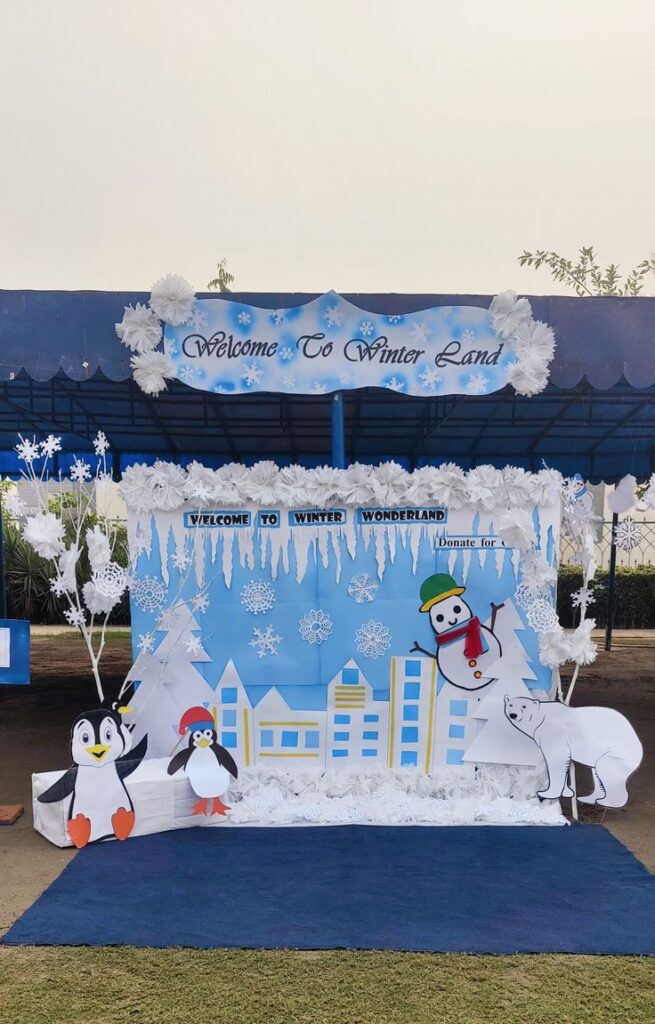
Add icicles made from white paper cutouts to the top of the board for a dramatic effect. Snowflakes and silver glitter scatter in the background. Hang additional snowmen and snowflakes from above to complete the magical winter wonderland vibe!
See My Work in Action
Take a closer look at my magical winter-themed decoration by watching this video:
- Cheerful Snowman with a Real Red Scarf
- Handcrafted Penguins & Polar Bear
- Hanging Snowflakes & Fluffy Cotton Snow
Step into a magical world of snowflakes, cozy cheer, and frosty fun as this Winter Wonderland backdrop comes to life—crafted with love, creativity, and a touch of seasonal sparkle!
Watch the creativity unfold and get inspired to make your own.
Frequently Asked Questions
- What age group is this Winter Wonderland backdrop suitable for?
This decoration is ideal for preschool to middle school students. It is fun, charming, and perfect for school hallways, classrooms, or winter parties. - Can I reuse the decorations for next year?
Yes! Use sturdy materials like cardstock or laminated paper so you can safely store and reuse elements like snowmen, penguins, and snowflakes. - How long does it take to create a complete background?
Depending on the size and detail, this can take 2-3 hours. As a classroom group activity, it can be finished in about 1-2 hours. - Is the snowman template available for download?
Yes! A free printable snowman template is included in the post. Just look for the “Download PDF” link in the snowman section. - Can I make a smaller version for home or smaller spaces?
Absolutely! You can scale down all the elements to create a cozy display for a corner of the house, a classroom wall, or a bulletin board.
Final Thoughts
Creating a winter wonderland backdrop is a fun and charming craft that brings warmth and joy to any setting. Whether it’s for a classroom, party, or seasonal home decor, this easy-to-follow DIY project is sure to capture the essence of winter magic. Don’t forget to download and print the snowman template included in the images for a seamless crafting experience!
Did you try this craft? Share your creations with us in the comments below!


Pingback: Orientation Day Backdrop and Stage Decoration Ideas - 1thousandideas
You made some decent factors there. I seemed on the internet for the difficulty and found most individuals will go together with with your website.