Creative, Affordable, and Inspiring Library Wall Art Idea for Your Entrance
Creating a vibrant, welcoming space in your school or home library can inspire young minds to read, explore, and dream. One of the most creative ways to achieve this is to design DIY library wall art using colorful foam sheets with embossed shapes. In this blog post, I’ll tell you how I created a charming wall art display outside the library using simple materials, a meaningful message, and a lot of love.
Why Decorate Your Library Wall?
A library is not just a place for books. It is a place for learning, imagination, and discovery. When students or visitors enter a library and see an inviting wall that celebrates their potential, they feel valued and encouraged. Visual displays can reinforce the message that “you matter” and “you belong here.”
This DIY project serves as both a decorative piece and an educational tool, reminding everyone that they are writers, readers, authors, leaders, thinkers, dreamers, explorers, researchers, adventurers, and storytellers.
Materials Used
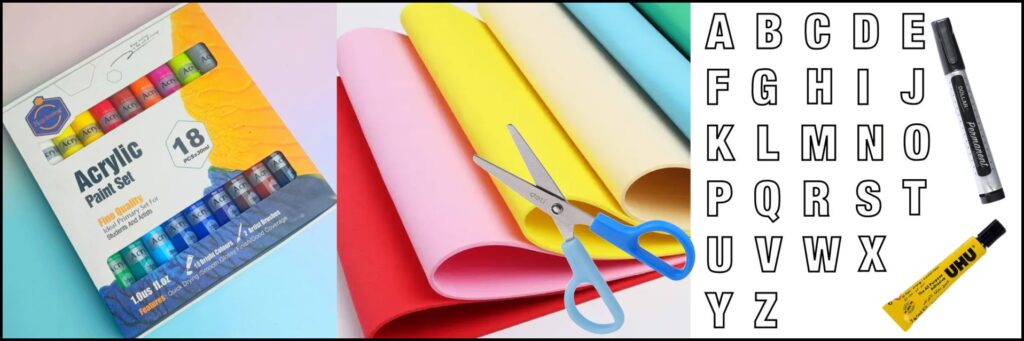
To make this vibrant library wall art, I used multi-color foaming sheets as the primary material. Here’s a complete list of what you’ll need:
✅ Supplies:
- Foaming sheets (variety of colors)
- Acrylic paints (for detailing)
- Permanent markers or paint pens
- Scissors and craft cutter
- Glue gun or strong adhesive
- Pencil and ruler (for layout)
- Printed or hand-drawn templates for uniform letter shapes
- Bookshelf and book designs (optional, hand-drawn or foaming sheet cutouts)
Why Foaming Sheets?
Foam sheets are a great material choice for DIY wall decor because:
- They are lightweight and easy to cut.
- The texture creates a slightly raised effect, giving the wall a 3D appearance.
- They come in vibrant colors and can be painted or written on.
- They are affordable and easy to find in craft stores.
Using them gives the project a professional, bold, and clean look while keeping the budget in check.
Step-by-Step Instructions
Step 1: Plan Your Layout
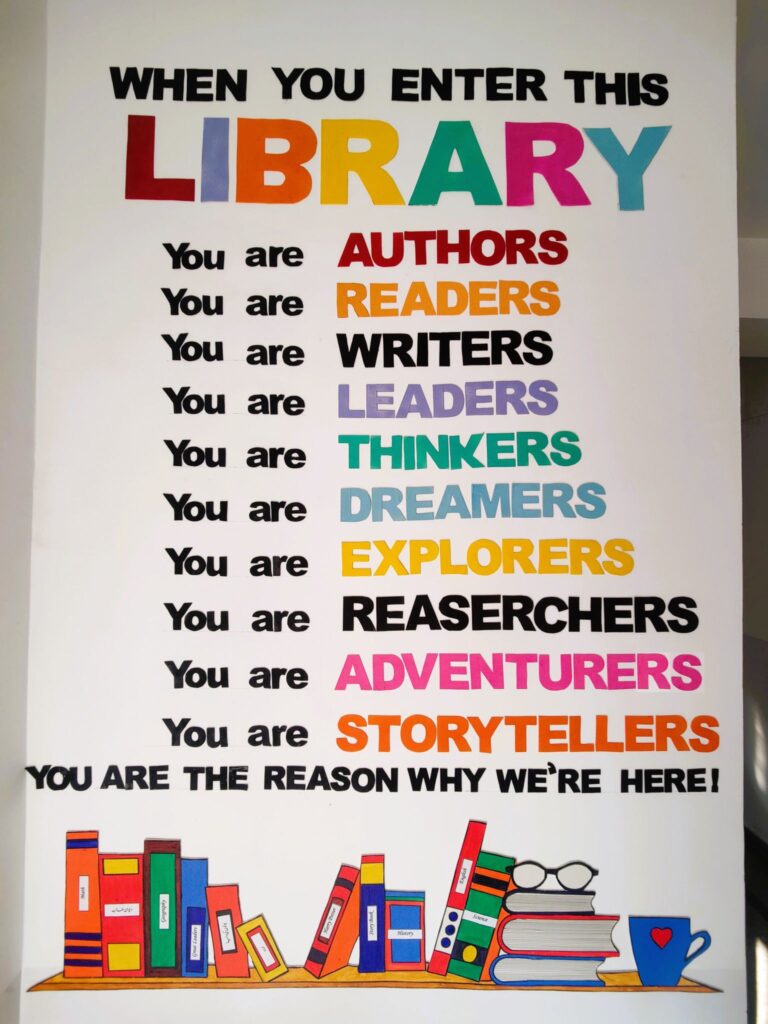
Before you begin, decide what message you want to convey. I chose the message:
“When you enter this library… You are writers, readers, authors, leaders…”
… ending with the heartfelt line:
“You are the reason we are here!”
Divide your sentences into sections and plan how you want to space them. I used large, colorful letters for key words like “library,” “authors,” “readers,” etc., and black bold letters for small words like “you are.”
Step 2: Choose and Cut Foaming Sheets
- Choose colors of foaming sheets to represent each desired word.
- Use a stencil or printable font to trace uniform letters onto the sheets.
- Carefully cut out each letter using scissors or a craft cutter for clean edges.
- Lay them out on a table before gluing to check color balance and alignment.
For example:
L – Red, I – Blue, B – Yellow, R – Green, A – Pink, R – Aqua, Y – Teal
This rainbow-style color scheme makes the word “library” pop!
Step 3: Prepare the Base
I used a white-painted wall as the background. You can also use board or canvas. Make sure the base is clean and smooth. Use a pencil and ruler to draw light guiding lines for even spacing.
Step 4: Glue and Assemble
- Use a hot glue gun or strong craft glue to attach each letter.
- Start with the main heading, “When you enter this library,” at the top.
- Then add each phrase line by line, such as:
- “You are the writer.”
- “You are the reader.”
- …and so on.
Keep the spacing consistent and align the left margin for a clear look.
Step 5: Add Book Illustrations
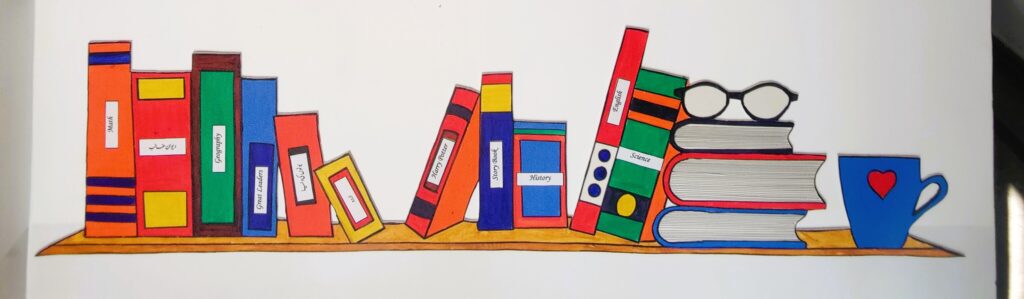
At the bottom of the wall, I drew and colored a bookshelf with books, a mug with a heart, glasses, and a few stacked novels.
- You can also make books using striped foam sheet rectangles and label them with “Math,” “History,” “Science,” etc.
- This gives the wall a library-themed aesthetic.
This extra detail brings extra attention and makes the wall interactive and fun.
Step 6: Add Final Touches
- Go over any pencil lines or edges with a black paint pen to define the text.
- You can also outline some of the letters with white or black borders for extra contrast.
- If you want to protect it from dust or fingerprints, spray a light coat of clear varnish spray.
Tips for a Professional Look
- Use foam tape behind specific letters for an extra 3D lift.
- Stick to a color theme for balance—use rainbow colors for main words and black or a single tone for repeated text.
- Use large letters to make the message strong and clear.
- Tear your base sheet into pieces if you want to reuse it annually.
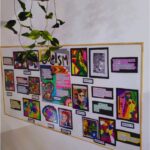
See My Work in Action
Take a closer look at my library wall art and its inspiring design by watching the video and exploring the images below:
- A great welcome message for every student
- Bright, bold letters with a 3D embossed look
- A colorful display that turns walls into words of encouragement.
This creative wall display transforms the library entrance into a positive and purposeful space. With affirmations like “You are readers, leaders, writers…”, each element is designed to inspire and empower young learners as they enter.
Watch how it all came together—and stay tuned for more creative classroom décor ideas!
Final Thoughts
Creating a DIY library wall art with painted foam sheets was a fun experience. It combined creativity, purpose, and positivity. The students love walking and reading the words. Teachers and parents smile when they see how it encourages children to embrace reading and learning.
Welcoming students at the library entrance with a meaningful style turns an ordinary hallway into a doorway to imagination. Let your wall speak to every child who enters—that’s why we’re here.

Pingback: Preschool Library Ideas: Create a Magical Reading Space - 1thousandideas
Very fantastic visual appeal on this internet site, I’d rate it 10 10.